Need to fix your powerbank? Let’s make it simple.
Powerbanks are essential for keeping our devices charged on the go. But what do you do when it stops working? Instead of buying a new one, you can try to repair it yourself. Repairing a powerbank might seem tough, but it’s often easier than you think.
Understanding the common issues and knowing how to fix them can save you time and money. In this guide, we’ll walk you through some basic steps to get your powerbank working again. Whether it’s a battery problem, a faulty connection, or a broken port, you’ll find helpful tips here. Ready to bring your powerbank back to life? Let’s dive in!
Introduction To Powerbank Repair
Fixing a powerbank can save money and extend its life. This guide explains steps to identify and solve common issues. Learn basic troubleshooting techniques and tools needed for effective repairs.
Powerbanks are essential for keeping our devices charged. But they can break down. Learning to repair a powerbank can save money and reduce waste. This guide will help you understand basic repair steps.
Why Repair A Powerbank?
Repairing a powerbank is cost-effective. New powerbanks can be expensive. Repairing also helps the environment. Fewer broken gadgets end up in landfills. You can learn valuable skills through repair. It brings a sense of accomplishment.
Safety Precautions
Safety is crucial during repairs. Always disconnect the powerbank from any power source. Wear safety gloves to protect your hands. Use insulated tools to avoid electric shocks. Check for visible damages before starting. Work in a well-ventilated area. Follow these steps to ensure a safe repair process. “`

Credit: www.youtube.com
Tools And Materials Needed
Repairing a power bank can be a rewarding and cost-effective task. To begin, you need the right tools and materials. This section will guide you through what you need to successfully repair your power bank.
Essential Tools
Having the right tools is crucial for a smooth repair process. Here are the essential tools:
- Screwdrivers: Different sizes for various screws.
- Multimeter: To check voltage and current.
- Soldering iron: For connecting wires and components.
- Wire cutters: For trimming excess wires.
- Tweezers: To handle small parts safely.
- Heat gun: For shrinking tubes and loosening adhesives.
Required Materials
With the right tools, you also need specific materials. Here is a list of required materials:
- Replacement batteries: Ensure they match the original specifications.
- Wires: For making necessary connections.
- Solder: To secure connections.
- Insulating tape: For covering exposed wires.
- Heat shrink tubing: To protect soldered joints.
- Adhesive: To secure components in place.
Identifying Common Issues
Identifying common issues in your powerbank is the first step to repair it. This section will guide you through recognizing common problems you might face. Understanding these issues will help in fixing your powerbank effectively.
Battery Problems
One of the most frequent issues is battery problems. Powerbanks rely on their batteries to store and provide power. If your powerbank is not charging or discharging properly, it may have a faulty battery. Here are some common signs:
- The powerbank doesn’t hold a charge.
- It charges slowly or not at all.
- It gets very hot during charging.
If you encounter any of these signs, you might need to replace the battery. Be sure to use a battery that matches the specifications of your powerbank.
Circuit Board Issues
The circuit board is another crucial component that can fail. Issues with the circuit board can prevent your powerbank from charging or discharging correctly. Here are some indicators:
- The powerbank doesn’t turn on.
- LED indicators are not functioning.
- Random shutdowns or restarts.
To fix circuit board issues, you may need to inspect for any visible damage. Check for burned components or loose connections. If you find any, you might need to solder the loose connections or replace damaged parts. Always ensure the powerbank is unplugged before attempting any repairs.
By identifying these common issues, you can diagnose and repair your powerbank effectively.

Credit: www.instructables.com
Disassembling The Powerbank
Disassembling a powerbank is a crucial step in repairing it. By carefully opening the case and removing the battery, you can diagnose and fix many common issues. Follow these steps to safely disassemble your powerbank.
Opening The Case
Before you start, gather the necessary tools. You will need a small screwdriver, a plastic pry tool, and a clean workspace.
- Turn off the powerbank and disconnect it from any devices.
- Locate the screws holding the case together. They are usually hidden under labels or rubber feet.
- Use the screwdriver to remove the screws. Keep them in a safe place.
- Carefully insert the plastic pry tool into the seam of the case.
- Gently work your way around the edges to release the clips holding the case together.
- Once the case is open, set it aside for reassembly later.
Opening the case requires patience. Take your time to avoid damaging the powerbank.
Removing The Battery
With the case open, you can now access the internal components. The battery is usually the largest component inside the powerbank.
| Step | Description |
|---|---|
| 1 | Identify the battery and its connections to the circuit board. |
| 2 | Use the screwdriver to remove any screws securing the battery. |
| 3 | Carefully disconnect the battery from the circuit board. |
| 4 | Lift the battery out of the case. |
Be cautious when handling the battery. Avoid puncturing or bending it.
With the battery removed, you can now proceed with further diagnostics or replace it with a new one. Reassembling the powerbank follows the reverse of these steps. Ensure all connections are secure and the case is closed properly.
Fixing Battery Problems
Powerbanks are essential gadgets. They keep our devices charged on the go. But sometimes, powerbanks have battery problems. The powerbank might not charge, or it may drain quickly. Fixing battery problems can help restore your powerbank’s performance.
Testing The Battery
First, you need to test the battery. This helps identify if the battery is the issue. Follow these steps:
- Charge the powerbank fully.
- Use a multimeter to check the output voltage.
- Compare the reading with the powerbank’s specifications.
If the voltage is low, the battery might be weak. Note the battery’s performance over time. Does it discharge quickly? This could indicate a dying battery.
Replacing The Battery
If testing shows a weak battery, consider replacing it. Follow these steps:
- Open the powerbank casing carefully.
- Disconnect the old battery from the circuit board.
- Note the battery’s specifications (voltage, capacity).
- Purchase a new battery with the same specifications.
- Connect the new battery to the circuit board.
- Close the casing securely.
Ensure the connections are tight. Loose connections can cause issues. Check if the new battery works as expected.
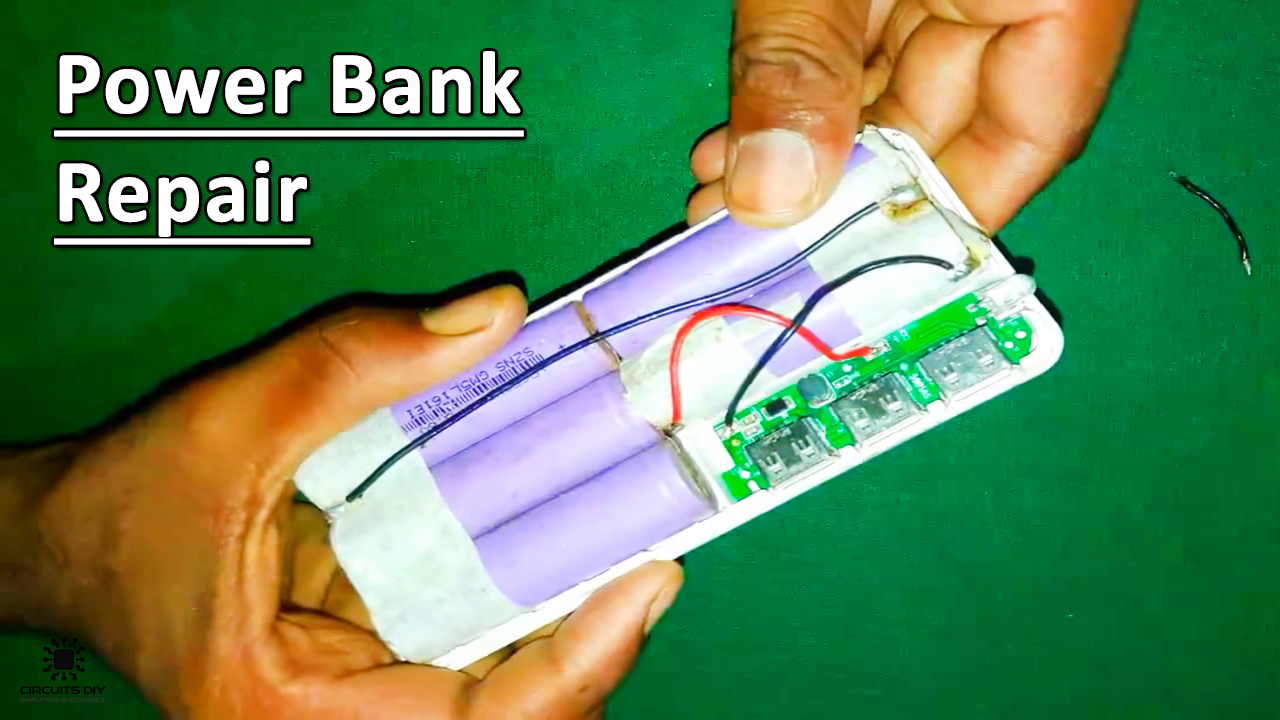
Credit: www.circuits-diy.com
Repairing Circuit Board Issues
Repairing a powerbank’s circuit board can be challenging but rewarding. It requires attention to detail and some basic knowledge of electronics. This section will guide you through the process of identifying and fixing common circuit board problems in your powerbank.
Inspecting The Circuit Board
First, open the powerbank carefully. Use a screwdriver to remove any screws. Keep the screws in a safe place. Once opened, locate the circuit board. Inspect the board for visible damage. Look for burnt components, broken traces, or loose connections.
Use a magnifying glass if needed. Pay close attention to the areas around the USB ports. These are often the first to suffer damage. Take note of any areas that look suspicious or damaged.
Replacing Faulty Components
Identify the damaged components. Common components include resistors, capacitors, and diodes. Use a multimeter to test these components. If a component is faulty, it will need to be replaced.
Here is a simple table to help you identify common components and their functions:
| Component | Function |
|---|---|
| Resistor | Limits electrical current |
| Capacitor | Stores electrical energy |
| Diode | Allows current to flow in one direction |
To replace a component, desolder the old component first. Use a soldering iron and desoldering pump. Be careful not to damage the board. Once removed, place the new component in the same position. Solder it securely in place.
After replacing the faulty components, reassemble the powerbank. Test it to ensure it is working correctly. If it still does not work, double-check your repairs. Ensure all components are properly soldered and connected.
Reassembling The Powerbank
Reassembling the powerbank is the final step in the repair process. Follow these steps to ensure your powerbank works perfectly again. Pay attention to the details for a successful reassembly.
Securing The Battery
First, place the battery back into its slot. Ensure it sits firmly. Double-check the wiring connections. They should be tight and secure. Loose connections can cause the powerbank to malfunction.
Use tape if necessary to hold the battery in place. This prevents movement inside the case. A secure battery ensures better performance and safety.
Closing The Case
Align the case parts correctly. This ensures a snug fit. Carefully press the parts together. Listen for clicks indicating the parts are locked.
Use the screws you removed earlier. Tighten them to secure the case. Do not overtighten. This could damage the plastic. A closed case protects the internal components. Your powerbank is now ready for use.
Testing The Repaired Powerbank
Once you have repaired your powerbank, it’s important to test it. These tests ensure that your powerbank works safely and efficiently. Follow the steps below to confirm the repair success.
Initial Power On
First, press the power button on the powerbank. Check if the LED indicators light up. If the LEDs are working, it means the powerbank is receiving power. If the LEDs do not light up, the repair may not be successful. Check the connections and try again.
Charging And Discharging Tests
Next, plug the powerbank into a wall charger. Observe if the powerbank starts charging. The LED indicators should blink or change color. This signifies that the powerbank is charging properly.
After charging for an hour, unplug the powerbank. Connect it to a device like a smartphone. Check if the device starts charging. Monitor the charging for a few minutes. This ensures the powerbank can discharge power effectively.
Repeat this process a few times. Consistent results indicate a successful repair. If the powerbank fails at any step, recheck your repairs. Ensure all components are properly connected.
Maintenance Tips
Maintaining your powerbank is essential to ensure its longevity and efficiency. Proper care and regular maintenance can prevent common issues and extend the life of your device. Follow these maintenance tips to keep your powerbank in top shape.
Regular Check-ups
Inspect your powerbank regularly for any signs of damage. Look for cracks, swelling, or leaks. If you find any issues, stop using the powerbank immediately. Check the ports for dust and debris. Clean them gently with a soft brush or compressed air.
Monitor the battery performance. If you notice a significant drop in its capacity, it may need a professional check. Regular check-ups can help you catch problems early.
Proper Usage
How to Repair Powerbank.Use the powerbank as per the manufacturer’s instructions. Avoid overcharging your devices with it. Overcharging can lead to overheating and battery damage. Never expose your powerbank to extreme temperatures. High heat or cold can reduce battery life.
Store your powerbank in a cool, dry place. Keep it away from direct sunlight and moisture. Avoid dropping or shaking your powerbank. Physical shocks can damage the internal components. Proper usage ensures your powerbank remains reliable.
Frequently Asked Questions
How Do I Know If My Power Bank Is Broken?
Check if it charges devices, holds a charge, or shows any visible damage. If not, it may be broken.
Why Is My Power Bank Not Charging?
Ensure the charging cable and adapter are functional. Check the power bank’s input port for damage.
Can I Fix A Power Bank That Won’t Charge?
Yes, you can try replacing the charging cable, inspecting the ports, or resetting the power bank.
How Do I Reset My Power Bank?
To reset, press and hold the power button for 10-20 seconds. Release to restart the power bank.
Conclusion
How to Repair Powerbank. Fixing a powerbank isn’t hard with some patience and care. Follow our guide step-by-step, and you’ll save time and money. Remember to check for common issues like loose wires or faulty batteries. Always use the right tools and safety measures.
If unsure, it’s better to seek professional help. Regular maintenance can prevent problems. Keep your powerbank in good condition for longer use. Happy repairing!